For the second part of the assignment we divided in to smaller group with three people.
Yihui Wang (left side of the tank)Myself (Right side of the tank)WingYan Chick (Top side of the tank)Together we work for the back side of the tank


1. Pattern making. We wrapped the tank using paper this time and decided what kind of shape we want to create. Eventually we decided to divide into four parts. Here is part I'm doing.

2. After cutting the paper template we than draw the outline on the aluminium sheet.


3. Shaping the metal.
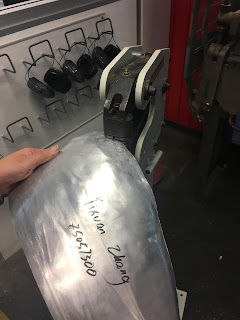
Cut the shape follow the outline that created. Mark the place need to be shrink or stretch.

The corners need to be shrink more for the radius of the shape. It combined the bowl and tray to make this shape.


Cut the shape follow the outline that created. Mark the place need to be shrink or stretch.

The corners need to be shrink more for the radius of the shape. It combined the bowl and tray to make this shape.


Checking the shape while making the model with mates.


